 README
README
Memento - Ethereum scraper and indexer
Memento is a tool developed by Alethio to scrape and index data from any web3-compatible networks.
The main goal of the tool is to scrape the raw data from the network, do the necessary transformations and insert it into an indexed database from which it is exposed through the integrated API.
Seamless integration with the Ethereum Lite Explorer by Alethio is coming soon to provide you the full blockchain exploration capabilities without the need of a third party.
Easily check the system status, perform various actions and manage your configuration through the built-in dashboard.

Contents
Features
Works with any web3-compatible node
As long as you have a web3-compatible node with an accessible JSON-RPC endpoint, you're good to go. It even works with Infura's API.
Automatic backfilling
No matter if the tool has been offline for a period of time or it is the first time it starts, if the backfilling feature is enabled, it will automatically take care of queueing the necessary blocks for scraping.
- if the feature is enabled, when the process first starts, it will add all the blocks in the
[0, best block]interval into the todo list - if the process is stopped for a while, it will automatically add all the blocks in the
[highest DB block, best block]interval into the todo list - since the redis list used for task management is a sorted set, the highest blocks always have priority - this means new blocks will be processed as soon as they appear while the backfilling will be happening in the otherwise-idle time
Chain reorganisations (reorg) handling
Whenever a reorg is detected we check the db for a block with the same number but different hash and replace it with the newest version. Note: this depends on the behavior of the node to which Memento is connected and it doesn't guarantee the data is 100% reorg-proof.
Lag function
If you don't want to deal with reorgs, enable the lag function, set a value (default 10 blocks) and enjoy your reorg-free data.
- when this function is enabled, Memento will wait a number of blocks (or confirmations) before scraping and indexing a specific block
- for example, if the lag feature is enabled and the value is set to
value: 10, Memento will only scrape the block100when the best block in the network is higher than110
Data validator
The tool includes a validator that checks if the data makes sense from a logical integrity standpoint for every block scraped. This avoids any inconsistencies that may occur throughout the scraping process.
Automatic migrations
If the feature is enabled, whenever the run function is called, it will automatically try to execute the database migrations. No need to worry when doing an upgrade.
Getting started
Configuration
Via dashboard
Note: Memento has to be running in order to access the dashboard & the config-management feature should be enabled.
This method is not recommended for the initial setup.
- Go to
http://localhost:3000/config(by default; if you configured a different port, use that one) - Modify whatever you need and click "Save & restart"
- Memento will exit in order to apply changes
- if you're running with the default docker-compose, it will restart automatically
- if you're manually running Memento via the executable, you'll have to start it again
- Done
Via config file / command line arguments
Please refer to config.sample.yml for a list of available configuration parameters.
All the options in the config file have a corresponding flag represented by the the tree elements concatenated with a . (dot), for example:
db:
  host: localhost
# transforms into "--db.host=localhost"

feature:
  lag:
    enabled: true
# transforms into "--feature.lag.enabled=true"
The following configuration options are only available through ENV variables.
# redis password
REDIS_PASSWORD

# database password
PG_PASSWORD
Installation
Building from source
Prerequisites
- a working Golang environment (tested with go v1.12.9)
- requires go modules (
>=go v1.11)
- requires go modules (
- Postgres
- Redis >= 5.0
- A JSON-RPC enabled and accessible Ethereum Client (Infura also works)
Clone the repo
git clone git@github.com:Alethio/memento.git
cd memento
Build the executable (it uses go modules, so it will automatically download the dependencies):
make
Copy the sample configuration and do the necessary adjustments
cp config-sample.yml config.yml
Start scraping 🎉
./memento run --vv
Open the dashboard to check progress
http://localhost:3000
Running with Docker
The simplest way to run the whole setup is by using the included docker compose
Copy the config and edit it as needed. By default, the values for postgres and redis are correct for using with docker compose.
mkdir -p .volumes/memento

cp config-sample.yml .volumes/memento/config.yml
Start everything
docker-compose up -d
If you already have a postgres instance & a redis instance set up and still want the simplest way, you can use the docker image from Dockerhub.
docker run --name memento -d -v /path/to/config/folder:/config/ alethio/memento:latest
Example output
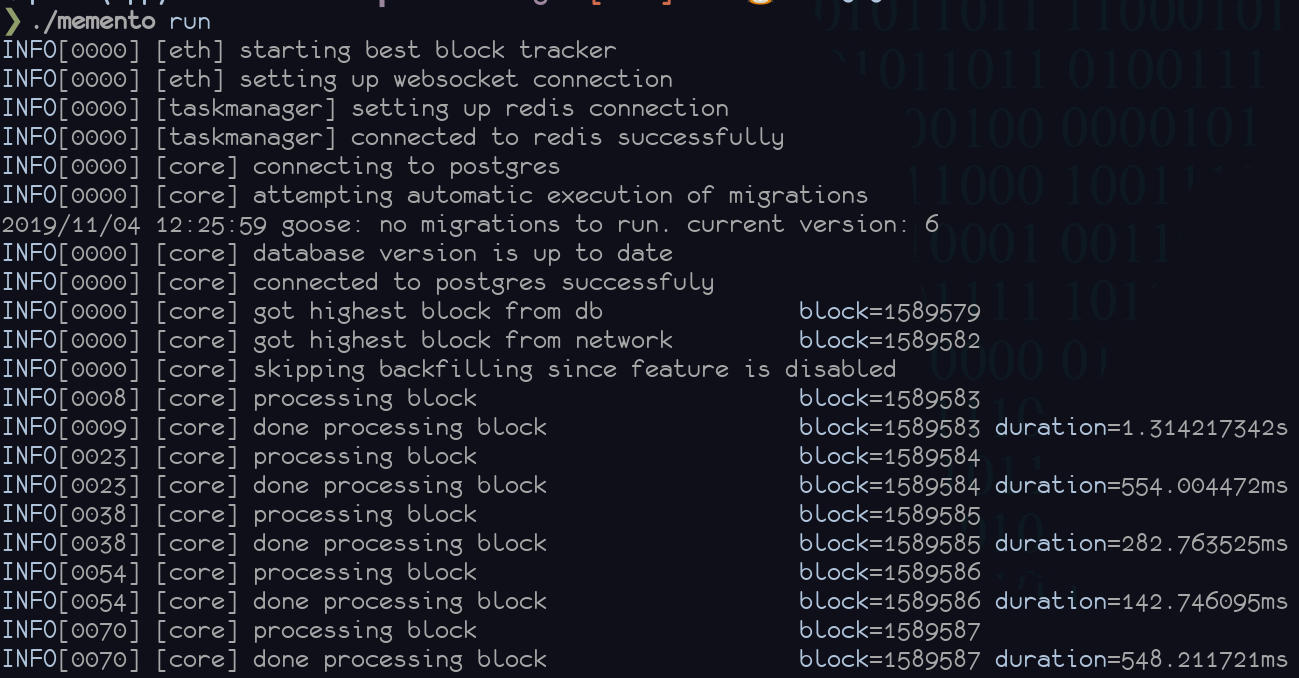
Result
After the program started, it will start following the best block from the network, scraping the data and indexing it into postgres.
It automatically exposes the dashboard on port :3000. You can also use the api on :3001/api/explorer.
Example setups
With Infura
Sign-up for an account or sign-in into your Infura account.
From the control panel, obtain your endpoint url for the network you are interested in (mainnet, ropsten, kovan, rinkeby). It will looks similar to https://mainnet.infura.io/v3/aa11bb22cc33......
Create the folder .volumes/memento/ if it doesn't exist already
mkdir -p .volumes/memento/
Copy config-sample.yml into .volumes/memento/config.yml and set the eth.client.http and eth.client.ws attributes to your Infura endpoint.
cp config-sample.yml .volumes/memento/config.yml
Start Memento
docker-compose up -d
Open the dashboard to check progress
http://localhost:3000
With Parity Light Client
This will allow you to run both your own node and indexing service. No third-party dependencies. It will be slower to browse older data because it is fetching it real time from other ethereum peer nodes but it's fast to sync and low in resource usage.
Install Parity Ethereum through one of the convenient methods and start it with the --light cli flag.
As a simple step, if you have Docker, you could just run
$ docker run -d --restart always --name parity-light -p 127.0.0.1:8545:8545 -p 127.0.0.1:8546:8546 parity/parity:stable --light --jsonrpc-interface all
Create the folder .volumes/memento/ if it doesn't exist already
mkdir -p .volumes/memento/
Copy config-sample.yml into .volumes/memento/config.yml and set the eth.client.http and eth.client.ws attributes to http://127.0.0.1:8545 and ws://127.0.0.1:8546 respectively.
cp config-sample.yml .volumes/memento/config.yml
Start Memento
docker-compose up -d
Open the dashboard to check progress
http://localhost:3000
With Ganache
First of all, if you do not have it, download and install Ganache which will give you your own personal test chain.
Create the folder .volumes/memento/ if it doesn't exist already
mkdir -p .volumes/memento/
Copy config-sample.yml into .volumes/memento/config.yml
cp config-sample.yml .volumes/memento/config.yml
Set the eth.client.http and eth.client.ws attributes to http://127.0.0.1:8545 and ws://127.0.0.1:8546 respectively.
Disable uncles scraping by setting feature.uncles.enabled: false
Start Memento
docker-compose up -d
Open the dashboard to check progress
http://localhost:3000
With Pantheon
This is a great way to use a full featured client, and to see how the explorer works with a private network.
First of all, if you do not have it, download and install Pantheon stable release.
To get started, run a Pantheon node with the HTTP and WebSockets JSON-RPC services enabled, allowing traffic from all hosts and CORS origins:
$ pantheon --host-whitelist="*" --rpc-http-cors-origins="*" --rpc-http-enabled --rpc-http-host=0.0.0.0 --rpc-ws-enabled --rpc-ws-host=0.0.0.0
(Note: using "*" values for host whitelist and CORS origins is not a recommended way to run a production node securely, this configuration is intended for test or developement purpose only. For more information about these options, refer to the Pantheon CLI reference).
Create the folder .volumes/memento/ if it doesn't exist already
mkdir -p .volumes/memento/
Copy config-sample.yml into .volumes/memento/config.yml and set the eth.client.http and eth.client.ws attributes to http://127.0.0.1:8545 and ws://127.0.0.1:8546 respectively.
cp config-sample.yml .volumes/memento/config.yml
Start Memento
docker-compose up -d
Open the dashboard to check progress
http://localhost:3000
Command-line usage
Memento is comprised of a few commands that will be detailed below.
Summary:
run- the main command; use this to do the scraping and indexingmigrate- the manual version of executing the database migrationsreset- empty the database; use this if you want to start from scratchqueue- manually add a block / an interval of blocks in the todo list
run
Track new blocks and index them

Usage:
  memento run [flags]

Flags:
      --api.dev-cors                          Enable development cors for HTTP API
      --api.dev-cors-host string              Allowed host for HTTP API dev cors
      --api.port string                       HTTP API port (default "3001")
      --dashboard.config-management.enabled   Enable/disable the config management option from dashboard (default true)
      --dashboard.port string                 Memento Dashboard port (default "3000")
      --db.connection-string string           Postgres connection string.
      --db.dbname string                      Database name (default "coriolis")
      --db.host string                        Database host (default "localhost")
      --db.port string                        Database port (default "5432")
      --db.sslmode string                     Database sslmode (default "disable")
      --db.user string                        Database user (also allowed via PG_USER env)
      --eth.client.http string                HTTP endpoint of JSON-RPC enabled Ethereum node
      --eth.client.poll-interval duration     Interval to be used for polling the Ethereum node for best block (default 15s)
      --eth.client.ws string                  WS endpoint of JSON-RPC enabled Ethereum node (provide this only if you want to use websocket subscription for tracking best block)
      --feature.automigrate.enabled           Enable/disable the automatic migrations feature (default true)
      --feature.backfill.enabled              Enable/disable the automatic backfilling of data (default true)
      --feature.lag.enabled                   Enable/disable the lag behind feature (used to avoid reorgs)
      --feature.lag.value int                 The amount of blocks to lag behind the tip of the chain (default 10)
      --feature.uncles.enabled                Enable/disable uncles scraping (default true)
  -h, --help                                  help for run
      --redis.list string                     The name of the list to be used for task management (default "todo")
      --redis.server string                   Redis server URL (default "localhost:6379")

Global Flags:
      --config string          /path/to/config.yml
      --logging string         Display debug messages
      --v --logging=*=debug    Set all logging modules to debug (shorthand for --logging=*=debug)
      --vv --logging=*=trace   Set all logging modules to trace (shorthand for --logging=*=trace)
Example run
cp config-sample.yml config.yml
./memento run --vv
migrate
Manually run the database migrations

Usage:
  memento migrate [flags]

Flags:
      --db.connection-string string   Postgres connection string.
      --db.dbname string              Database name (default "coriolis")
      --db.host string                Database host (default "localhost")
      --db.port string                Database port (default "5432")
      --db.sslmode string             Database sslmode (default "disable")
      --db.user string                Database user (also allowed via PG_USER env)
  -h, --help                          help for migrate
      --migrations-dir string         path to directory containing database migrations (default "./migrations")

Global Flags:
      --config string          /path/to/config.yml
      --logging string         Display debug messages
      --v --logging=*=debug    Set all logging modules to debug (shorthand for --logging=*=debug)
      --vv --logging=*=trace   Set all logging modules to trace (shorthand for --logging=*=trace)
Example run
cp config-sample.yml config.yml
./memento migrate
reset
Reset the database to an empty state by truncating all the tables

Usage:
  memento reset [flags]

Flags:
      --db.connection-string string   Postgres connection string.
      --db.dbname string              Database name (default "coriolis")
      --db.host string                Database host (default "localhost")
      --db.port string                Database port (default "5432")
      --db.sslmode string             Database sslmode (default "disable")
      --db.user string                Database user (also allowed via PG_USER env)
  -h, --help                          help for reset
      --redis.list string             The name of the list to be used for task management (default "todo")
      --redis.server string           Redis server URL (default "localhost:6379")

Global Flags:
      --config string          /path/to/config.yml
      --logging string         Display debug messages
      --v --logging=*=debug    Set all logging modules to debug (shorthand for --logging=*=debug)
      --vv --logging=*=trace   Set all logging modules to trace (shorthand for --logging=*=trace)
Example run
cp config-sample.yml config.yml
./memento reset
queue
Manually add a block to the todo queue

Usage:
  memento queue [flags]

Flags:
      --block int             Add a single block in the todo queue (default -1)
      --from int              Add a series of blocks into the todo queue starting from the provided number (only use in combination with --to) (default -1)
  -h, --help                  help for queue
      --redis.list string     The name of the list to be used for task management (default "todo")
      --redis.server string   Redis server URL (default "localhost:6379")
      --to int                Add a series of blocks into the todo queue ending with the provided number, inclusive (only use in combination with --from) (default -1)

Global Flags:
      --config string          /path/to/config.yml
      --logging string         Display debug messages
      --v --logging=*=debug    Set all logging modules to debug (shorthand for --logging=*=debug)
      --vv --logging=*=trace   Set all logging modules to trace (shorthand for --logging=*=trace)
Example run
cp config-sample.yml config.yml

# queue a single block
./memento queue --block 123

# queue all blocks in the [0, 1000] interval
./memento queue --from 0 --to 1000
How to
Accessing the database directly when using docker-compose
docker exec -it memento-postgres psql -U memento
Queueing a block when using Docker
docker exec -it memento ./memento queue --config=/config/config.yml --block 100
 Documentation
Documentation

There is no documentation for this package.